Create a visitor ID attribute
This article provides detailed steps to create a visitor ID attribute. This example uses customer_id, which is typically available when a visitor makes a purchase, as a user identifier.
Learn more about Anonymous IDs, user identifiers, and visitor ID attributes and Best practices for selecting user identifiers.
Before you begin
To create a visitor ID attribute, first determine which event attribute is a good user identifier for your users. The value of the user identifier must be unique for each visitor. The user identifier is used to populate a visitor string attribute using a rule to match a qualifying event. A visitor string attribute is used to verify that the user identifier is unique for each visitor. After the visitor string attribute is verified to be unique across visitors, it is used to populate a visitor ID attribute.
This example uses customer_id as the user identifier and the purchase event as the qualifying event.
Step 1: Create a rule
Before you create a visitor ID attribute, you must create a rule to specify when the value is assigned to a visitor ID attribute.
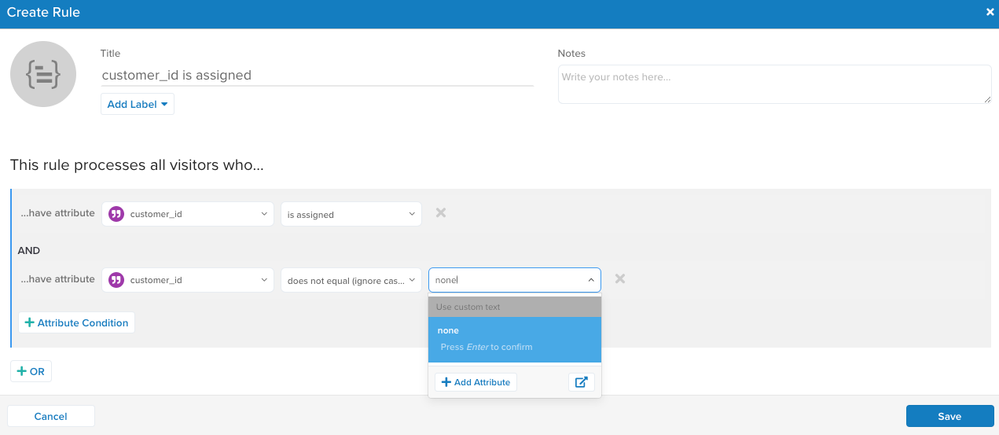
Use the following steps to create a rule to set the visitor ID attribute to customer_id when customer_id is assigned and the value is not “none”.
- Go to Server-Side Tools > Manage Rules.
- Click + Add Rule. The Create Rule dialog is displayed.
- Enter the Title, in this case “customer_id is assigned”.
- Click + Attribute Condition.
- Select
customer_idfor the attribute and is assigned from the operator drop-down list. - Click + Attribute Condition, select
customer_idfor the attribute, select does not equal (ignore case) for the operator, enter"none"for the value. - Click Save.

Step 2: Create a visitor string attribute
Create a temporary string attribute to use for verification in Audience Discovery. If you create a visitor ID attribute without verifying data, you risk improperly stitching visitor profiles.
Use the following steps to create a string attribute:
-
Go to AudienceStream > Visitor/Visit Attributes.
-
Click + Add Attribute.
-
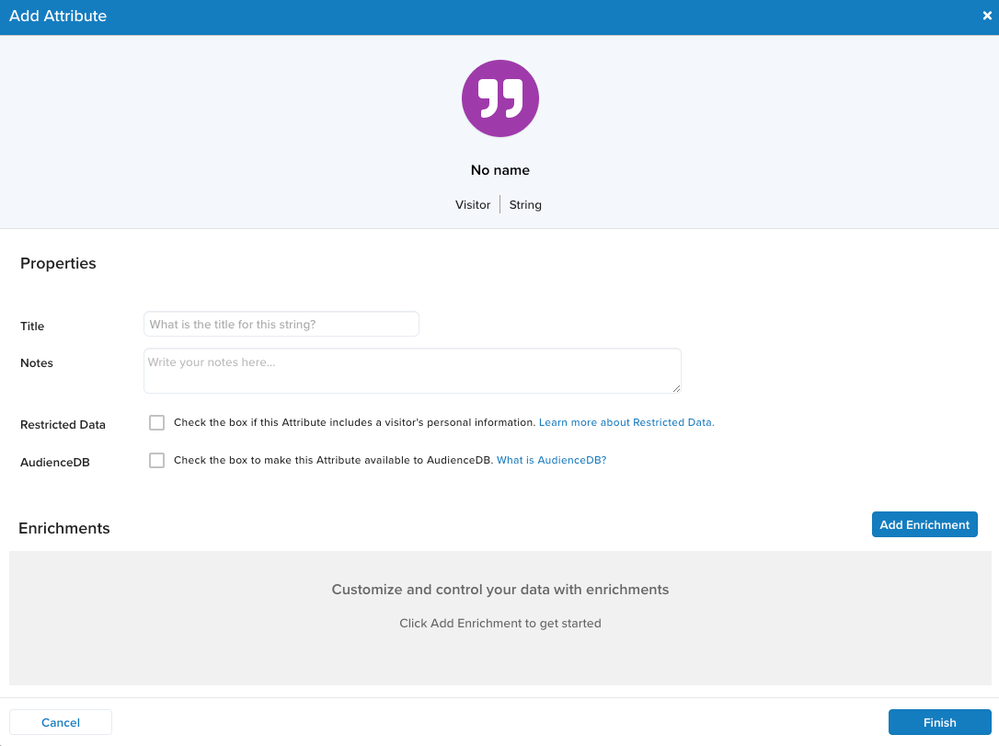
In the Add Attribute dialog, select Visitor for scope, then click Continue.
-
In the Add Attribute dialog, enter a Title and enter optional Notes.
-
In the Set String dialog, select
customer_idfor Set String to. -
For WHEN, select ANY EVENT.
-
In the Choose a rule field, select the rule created in Step 1.
-
Click Finish.
Step 3: Publish to production
Save and publish the rule and attribute to production so that AudienceStream can start collecting the data. The number of users on the website and the type of data being collected will determine how long to wait before you can verify the data in AudienceStream. If you are using a first-party cookie that is available for every visitor, data should appear within 15 minutes.
Step 4: Verify data
To verify that the chosen attribute is unique, use Audience Discovery to view the distribution of the attribute’s values across your active visitors. For more information, see Audience discovery.
Bad visitor string attributes
A bad visitor string attribute would be one where there are hundreds of users with the same value. If stitching was enabled, all these users would all be combined into a single visitor profile, which is obviously incorrect.
For example, if you see multiple instances of “unknown”, you can add conditions to the rule to exclude those instances. If there are many visitors with the same value for the visitor string attribute, choose a different user identifier to populate the string attribute and verify the results again.
Good visitor string attributes
In the case of a good visitor string attribute, only a small sample of users would have the same value. There may be multiple users with a value of “none”, which is normal because not every visitor has a value. It may be difficult to determine why visitors have the same value. When less than 1% of the visitors have two visitors assigned the same visitor string attribute, it is OK to use the chosen user identifier to populate a visitor ID attribute and enable visitor stitching.
Step 5: Create a visitor ID attribute
After you verify that you have a good visitor string attribute, create a visitor ID attribute. Set the visitor ID to the string attribute used for verification, and select the newly created rule. Save and publish to production to start recording data.
Step 6: Enable visitor stitching
After you create the visitor ID attribute, visit the Support Desk to request that visitor stitching be enabled for your account.
Use trace to see it in action
After the configuration is live, an example of stitching occurs as follows:
- A visitor logs into the website on their computer. Visitor profile A is created and captures the visitor ID attribute. Eventually the session ends.
- The same visitor later logs into the website from a mobile device. Visitor profile B is created and captures the visitor ID attribute.
- AudienceStream determines that profile A and profile B share the same value for the visitor ID attribute, and both profiles are stitched and merged into Profile C.
This page was last updated: January 29, 2025

