Facebook Lead Ads Data Connect Integration Setup Guide
This article describes how to set up an integration between Tealium Data Connect and Facebook Lead Ads.
The Facebook Lead Ads Data Connect integration offers several ways to improve your marketing strategies and streamline customer data management. You can collect leads, import them into your CRM system for quick access, set up automated follow-ups, trigger real-time personalization, and automate marketing efforts to turn leads into customers.
Send conversion lead ads using the Send Lead Event in Data Connect. To set up conversion lead events, follow the guide below.
Requirements
- Tealium EventStream or AudienceStream
- Tealium Data Connect
- Lead ID
Use cases
Here are some ways you can use the Tealium Data Connect integration with Facebook Lead Ads:
- Lead generation and enrichment: Use Facebook Lead Ads to collect leads from potential customers. Then, integrate these leads into your CRM system and enrich them with additional data using Tealium Data Connect to create more detailed customer profiles.
- Seamless lead import: Automatically import leads generated from Facebook Lead Ads into your CRM system through Tealium Data Connect. This ensures that your sales and marketing teams have immediate access to new leads.
- Automated follow-up: Set up automated follow-up sequences in your CRM that are triggered by lead submissions through Facebook Lead Ads. This can include sending personalized emails, SMS messages, or scheduling follow-up calls.
- Real-time personalization: When a lead interacts with your Facebook Lead Ads, Tealium Data Connect can trigger real-time personalization on your website or in your email campaigns. This ensures that leads are immediately engaged with tailored content.
- Lead scoring and segmentation: Automatically score and segment leads based on data collected by Facebook Lead Ads. This allows you to effectively prioritize and target leads, ensuring your sales team focuses on the most promising prospects.
- Marketing automation: You can integrate Facebook Lead Ads with your marketing automation platform using Tealium Data Connect. This enables automated follow-up emails, SMS messages, or other communications to move leads through the sales process.
- Suppression: Exclude individuals who have unsubscribed from email communications, opted out of specific email campaigns, or have already converted or taken the desired action. This ensures compliance with regulations like GDPR, maintains an organized email marketing list, and prevents unnecessary ad spending on audiences that have already achieved the desired conversion.
Integration flow
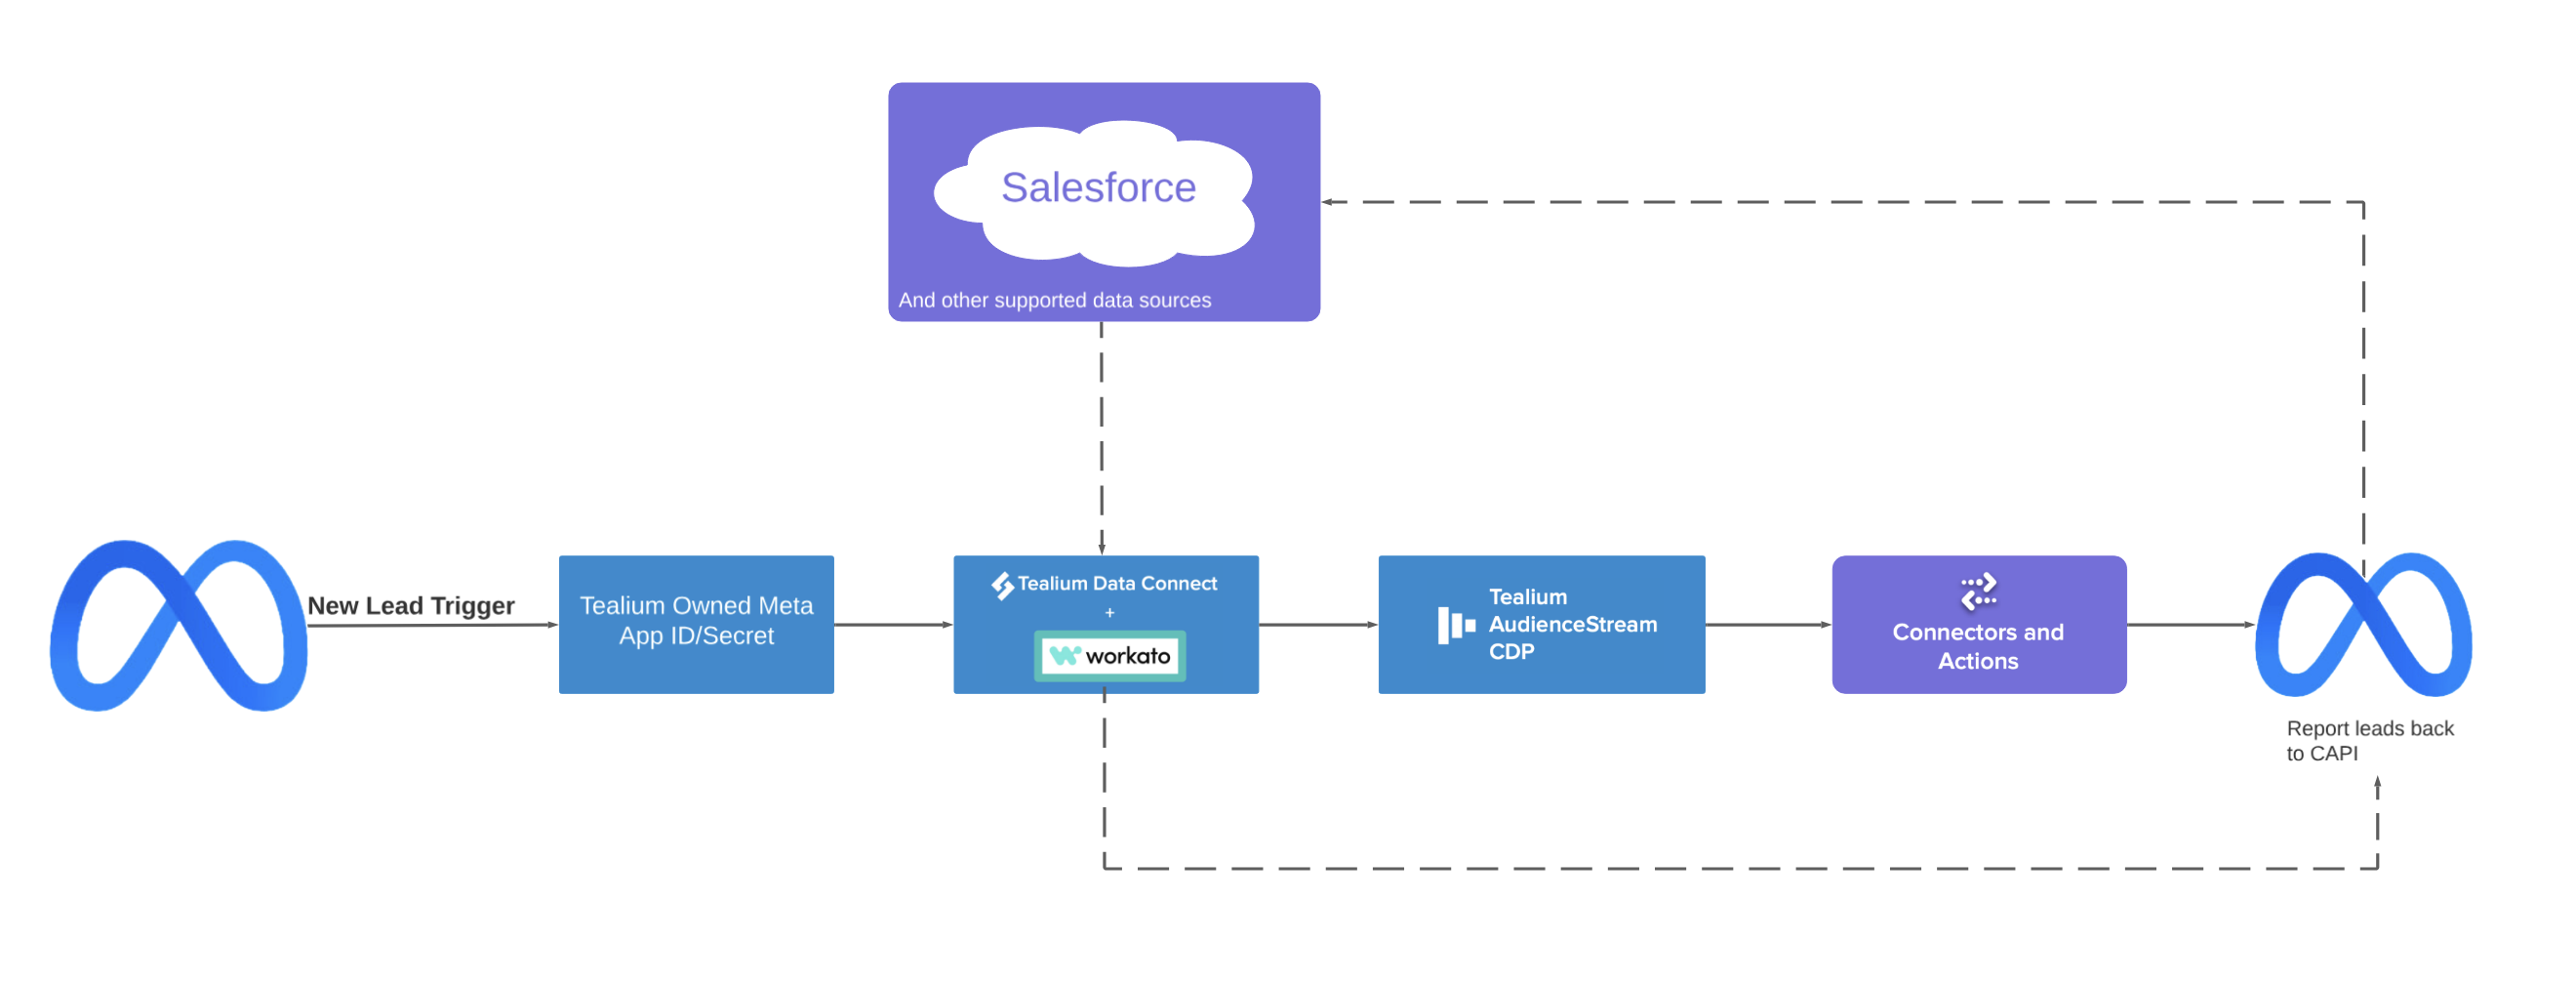
The diagram below illustrates the Facebook Lead Ads Data Connect integration flow. Follow the detailed instructions below to successfully set up your Tealium Data Connect integration with Facebook Lead Ads.
Create a Facebook Lead Ads integration
These are the steps required to create a Facebook Lead Ads integration with Tealium Data Connect:
- Set up a Tealium Connect data source.
- Create a recipe to send new leads from Facebook to Tealium.
- Set up an audience and audience connector to send new/updated lead records from Tealium to Salesforce.
- Create another recipe to receive new/updated lead records from Salesforce to Tealium.
- Set up event feed for leads.
- Set up an event connector to send updated lead records back to Facebook.
- Test with trace and activate the recipe.
Step 1: Set up a Tealium Connect data source
Set up a Tealium Connect data source. For the steps, see set up a Tealium Connect data source.
Step 2: Create a new recipe to send new leads from Facebook to Tealium
For details on how to create a new recipe, see create a recipe in Data Connect.
Complete the following steps to create and set up your recipe:
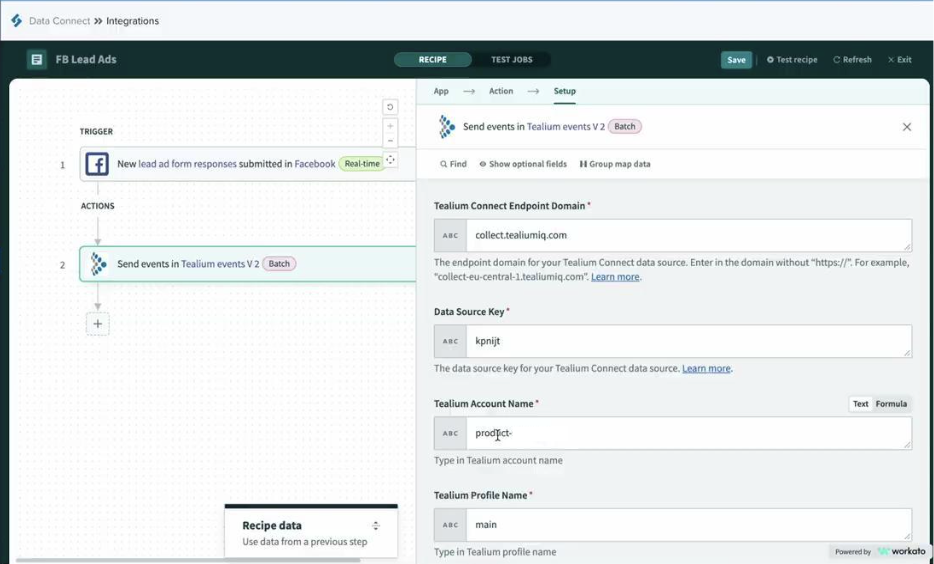
- Go to DataConnect > Integrations and create a new recipe that triggers from the Facebook Lead Ads app. For details on how to create a recipe that Triggers from an App, see the steps to create a recipe in Create a recipe in Data Connect.
- To build your recipe:
-
Under Trigger, select New Lead.
-
Connect to your Facebook Business Manager account.
-
Once connected, configure the connector settings to specify which Facebook Lead Ads account and forms you want to pull data from:
-
In the Setup step:
- Select the Page you want to pull data from.
- In the Form ID field, select Use form ID and enter a form ID from your Meta Business Suite (formerly Facebook Business Manager).
-
Set up an action to send new lead generations to Tealium. For details, see Configure an action.
-
Step 3: Send new/updated lead records from Tealium to Salesforce
Complete the following steps to send new or updated lead records from Tealium to any other CRM of choice. This example uses Salesforce:
- Set up an audience. For details, see Create an audience.
- Go to AudienceStream > Audience Connectors.
- Click + Add Connector and add the Salesforce Connector.
- In the Source step,
- Select the Audience you created above.
- Under Trigger, select Joined Audience.
- In the Configuration step,
- Enter a Name for this instance of the connector.
- Under Authentication, provide your login credentials to establish a connection.
- In the Action step:
- Enter a Name.
- In Action Type, select Insert Contact.
- Map the enriched attributes you want to send to Salesforce when there’s a new audience with a new lead.
Step 4: Create another recipe to receive new/updated lead records from Salesforce to Tealium
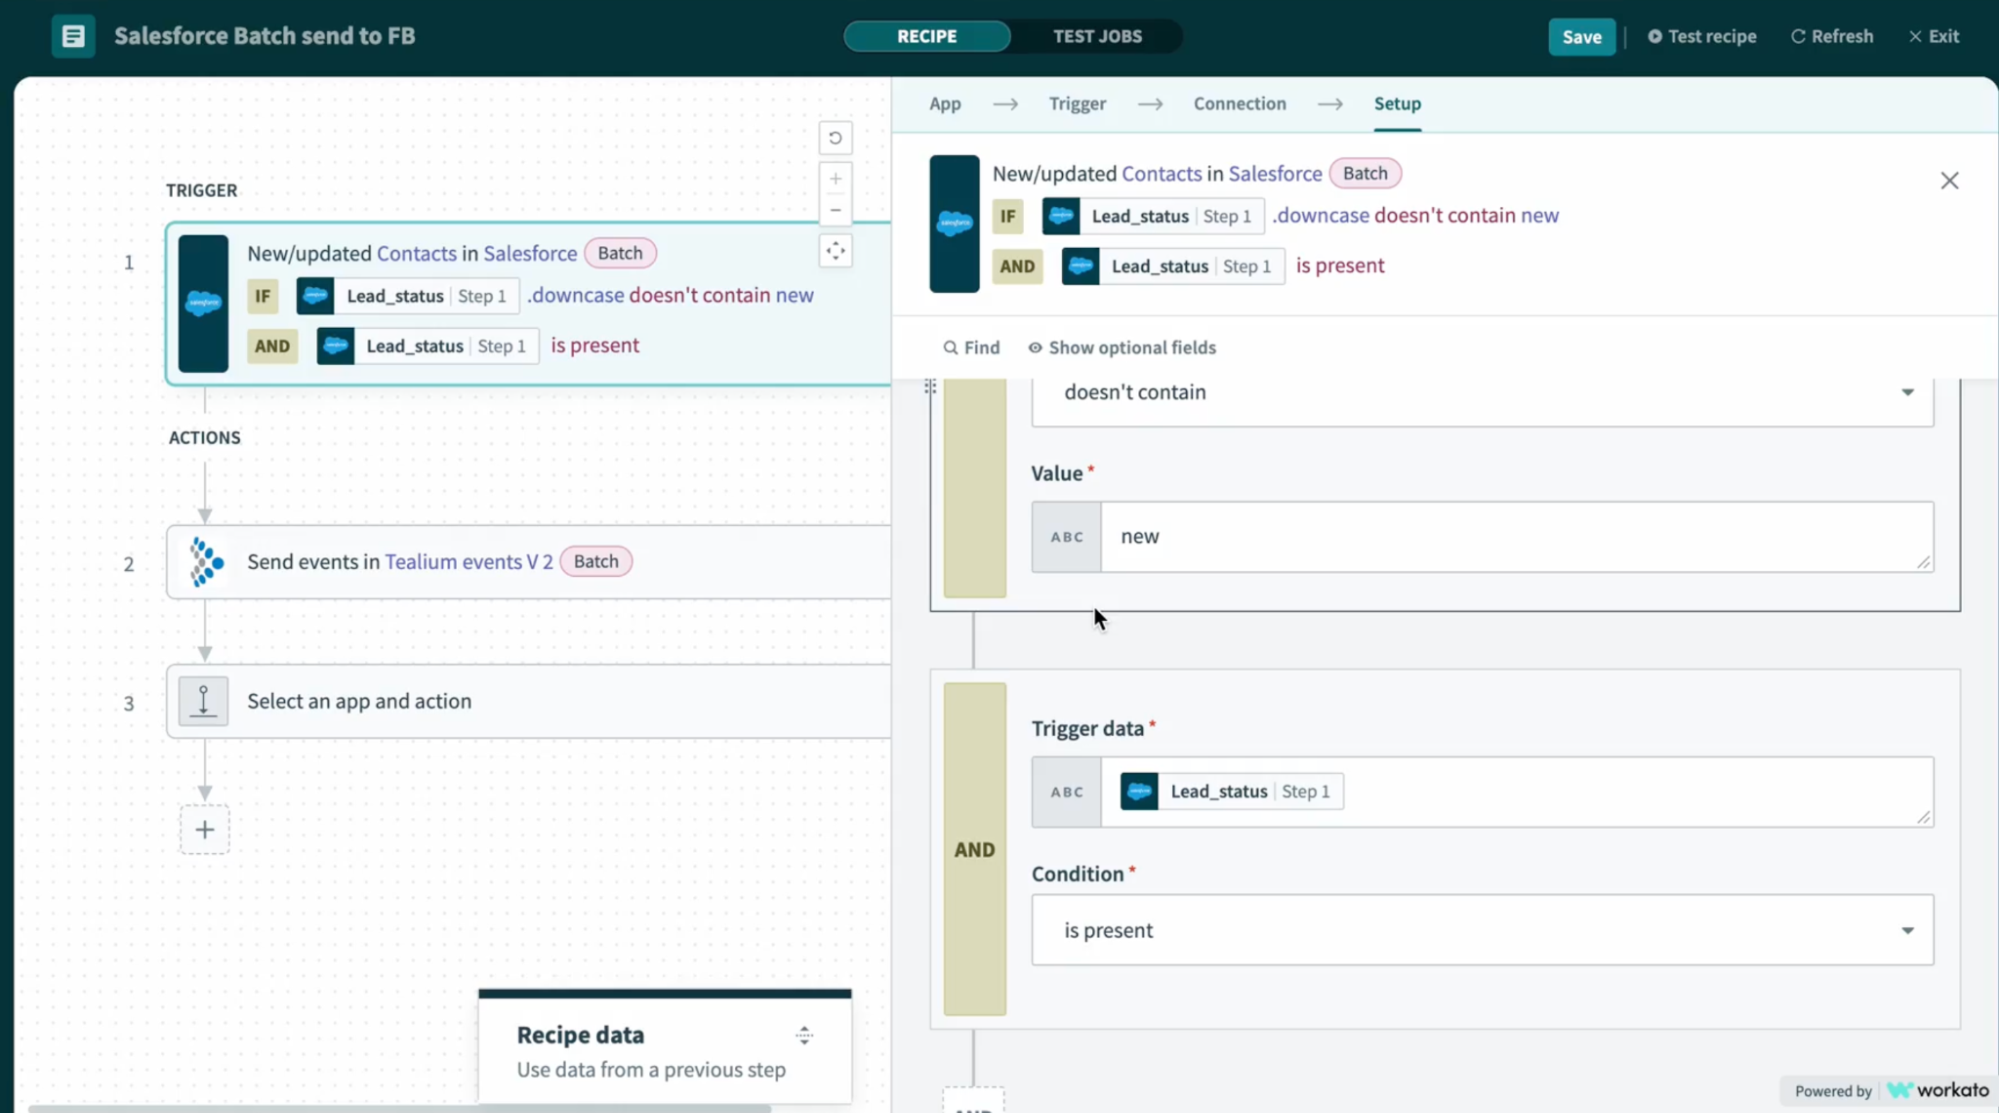
- Go to DataConnect > Integrations and create a new recipe that triggers from the Salesforce app. For details on how to create a recipe that Triggers from an App, see the steps to create a recipe in Create a recipe in Data Connect.
- To build your recipe:
-
Under Trigger, select New/Updated Records. You can select either batch or real time based on your needs.
-
Authenticate your Tealium Data Connect account with Salesforce. This may involve entering API keys or credentials.
-
Configure the connector settings to map the fields from Facebook Lead Ads to the corresponding fields in Salesforce. Ensure data mapping is accurate to avoid issues with data synchronization.
-
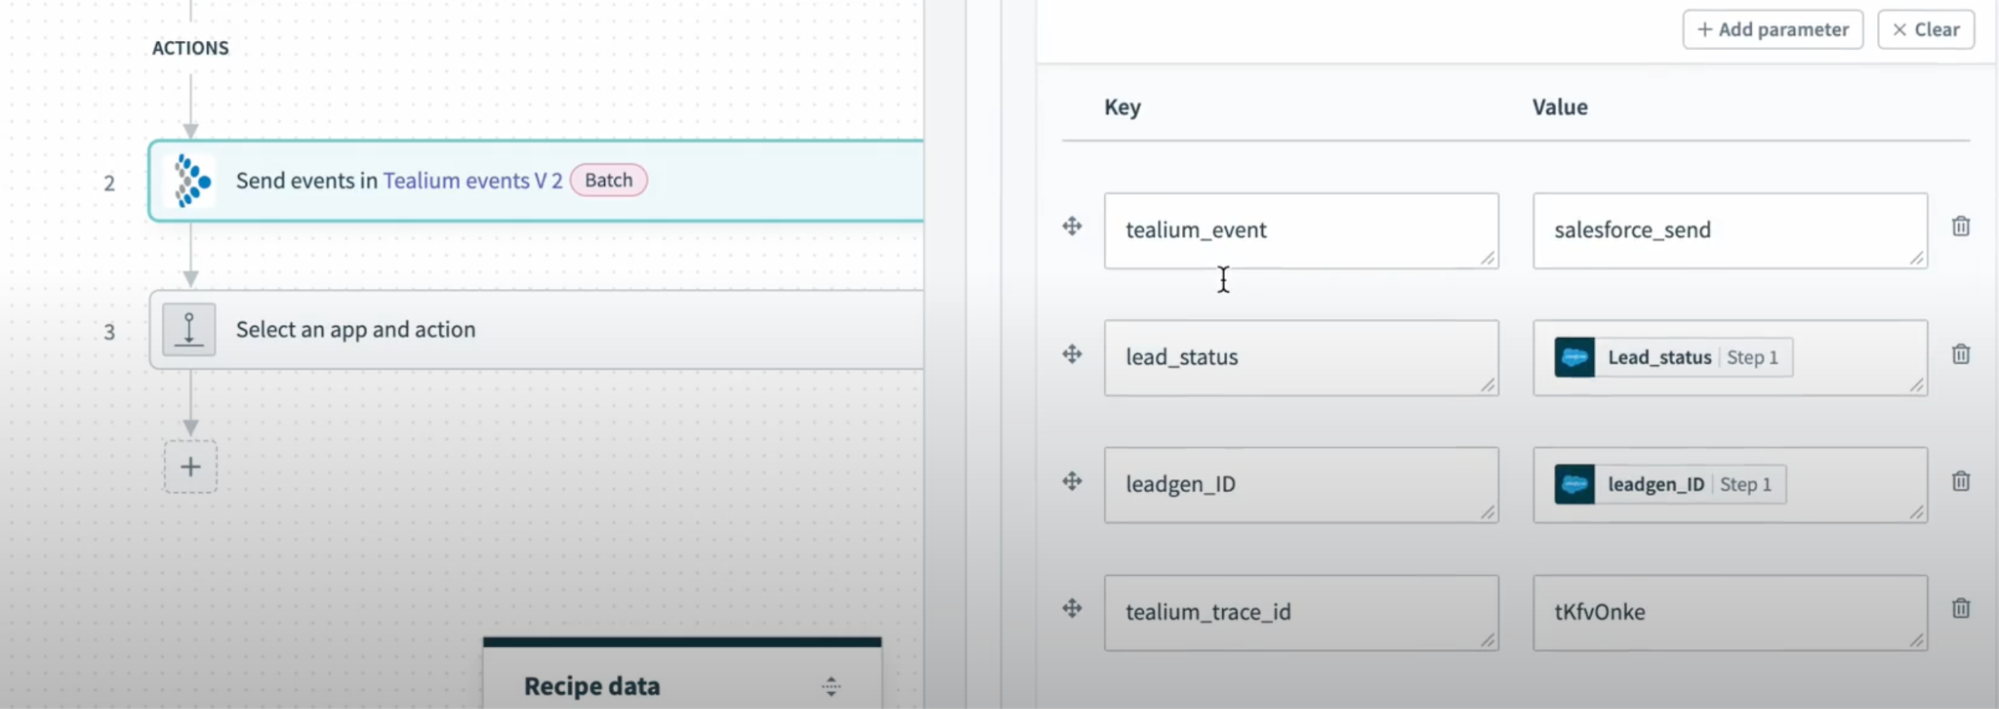
Set up an action to send new/updated records from Salesforce to Tealium. For details, see Configure an action.
-
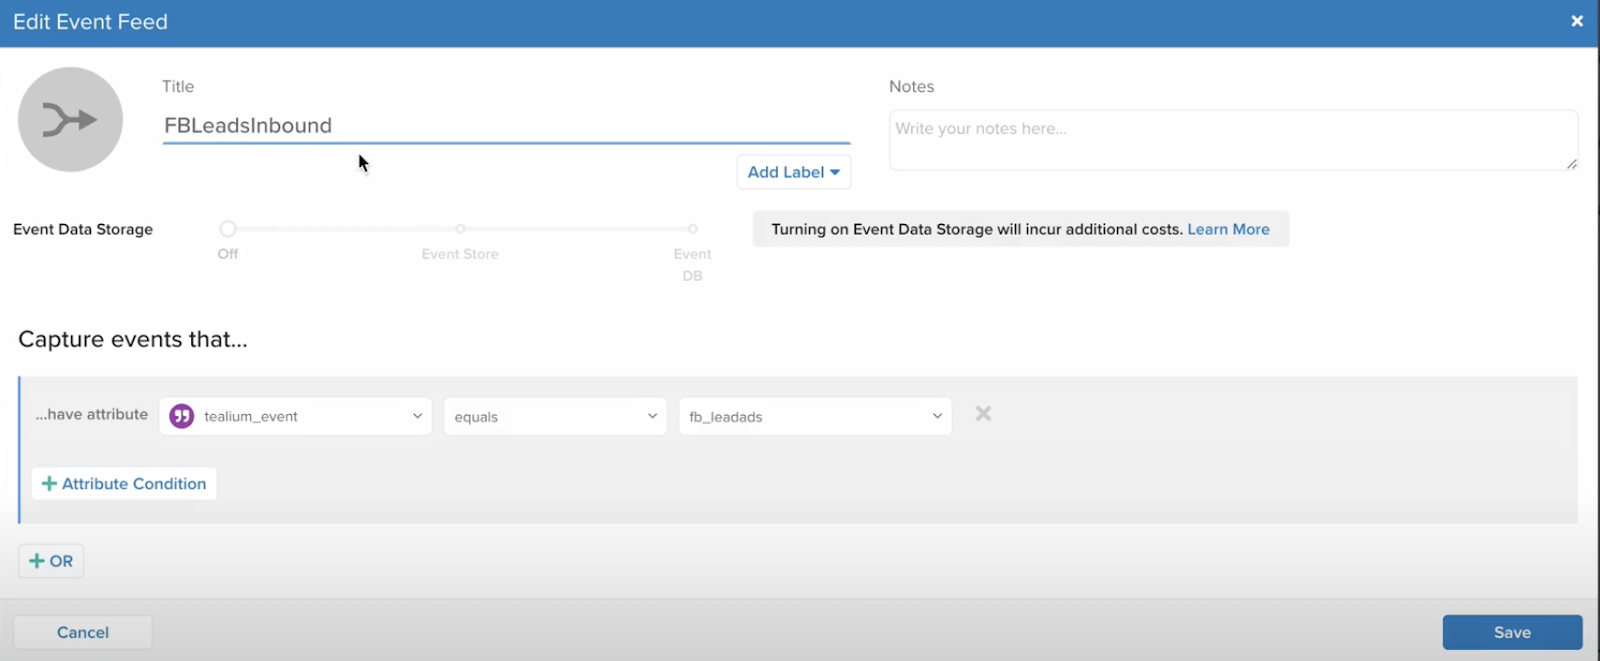
Step 5: Set up event feed for leads
Complete the following steps to create an event feed:
-
Go to EventStream > Live Events and click + Add Event Feed.
-
In the Create Event Feed dialog, enter a Title and any Notes.
The event feed title is dependent on how lead events come into Data Connect.
-
(Optional) Add Labels.
-
Enable the feed for EventStore or EventDB.
This setting requires your account to be enabled for DataAccess. -
Set an Attribute Condition for the feed to capture events that match new lead events.
-
Click Save.
-
Save and publish your account.
Step 6: Set up Facebook Conversions event connector to send leads
Follow these steps to set up the Facebook Conversions event connector to send leads to a back to Facebook:
- Go to EventStream > Event Connectors.
- Click + Add Connector and add the Facebook Conversions connector.
- In the Source step,
- Select the Data Source.
- Select the Event Feed you created in the preceding steps.
- In the Configuration step,
- Enter a Name for this instance of the connector.
- Under Authentication, provide your login credentials to establish a connection.
- In the Action step:
- Click Finish.
- Save and Publish your profile.
Step 7: Test with trace and activate the recipe
Before activating the recipe, perform thorough testing. Once testing is successful, activate the recipe to start the automated data integration process.
Follow these steps to test with trace and activate the recipe:
- In the sidebar, select Trace.
- Under New Trace, click Start. A dialog with a trace ID will appear.
- Copy the trace ID and click Continue.
- Go to Data Connect > Integrations.
- In the Integrations screen, do this for both recipes that send new leads from Facebook to Tealium and receive new/updated lead records from Salesforce to Tealium:
- Select your recipe.
- Select the Tealium Events V2 action to edit it.
- Under Attributes to add, add a new Key
tealium_trace_idand paste the trace ID in the Value. - Click Save.
- In the Start recipe drop-down list, click Test recipe.
- Return to the Trace interface to inspect the log details.
- Once you are done testing, click Stop test.
- To activate the recipe, click Start recipe.
This page was last updated: March 20, 2024
