Manage Audience Sizing
This article explains how to manage Audience Sizing.
To search visitors and create jobs based on your results, you must first specify a date range and at least one rule. The rules are the same as the rules used in visitor enrichments and audience creation.
Due to the nature of the historic data being queried, only rules containing visitor-level attributes are permitted.
Discover visitors
Use the following steps to set a date range and select the rule conditions for your job:
- In the sidebar, navigate to AudienceStream > Discover.
- Click the Audience Sizing tab.
- Under Historical Date Range, use the calendar tool to select the start and end date for your date range.
The system only finds (discovers) visitors with activity between the dates chosen. Visitors that have not had activity within the specified date range or that were purged due to the profile retention time are not searched. - Under Choose Rules, use the drop-down lists to select up to 3 rules.
The date range specifies the time during which a visitor was active, whereas rule conditions are evaluated against the current visitor profile, not the profile at the time of activity.
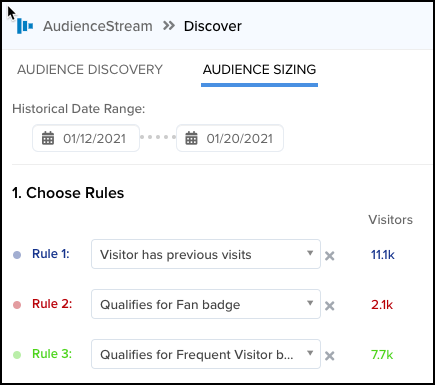
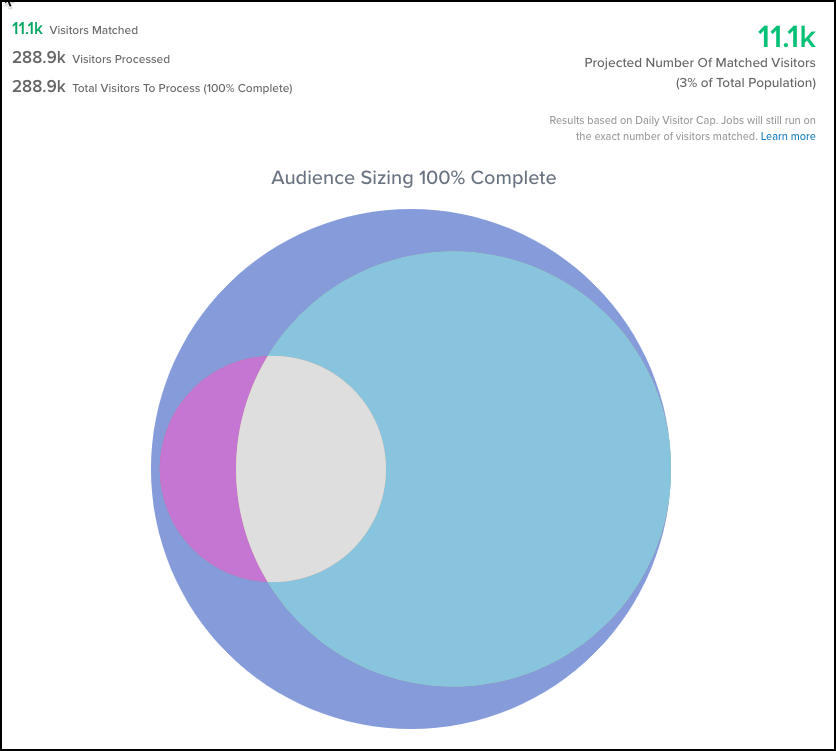
The query begins immediately upon selecting a rule and displays the number of visitors and percentage of total visitors processed until 100% is reached.
- (Optional) To remove one or more rules from your query, click the X next to the visitor count.
- Your results display as an interactive, color-coded Venn diagram with each circle representing one of the rules selected.
Create a job
Once you have identified a date range and the rules, use the following steps as an example of how to select a segment and create a job.
- Under Choose at least one rule to select audience segments, click Next.
- Under Select Segments, check one or more segments.
You must select at least one segment to proceed. - Click Set up job.
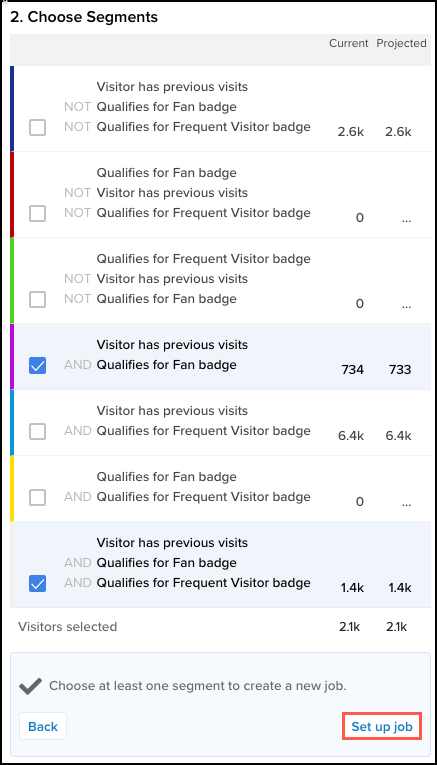
The Create Job dialog displays, including a summary or the segments you selected. You can assign a connector and action after the job is created. - Under What would you like to name your job?, enter a unique name, such as
Retarget Jeans Buyers Post Holidays.
This name will be used to identify the job when configuring it in a connector action. - Under What time range do you want to target when the job runs?, use the calendar drop-down to select the date range you want to target.
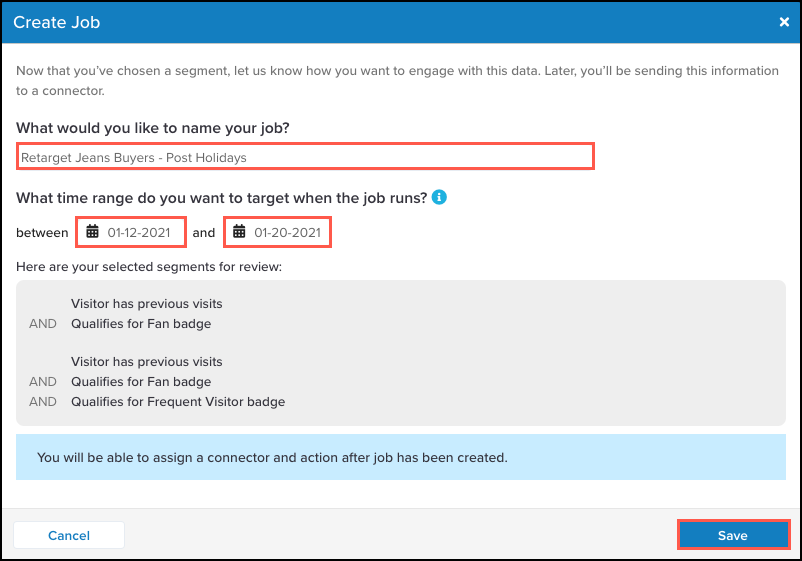
- Click Save.
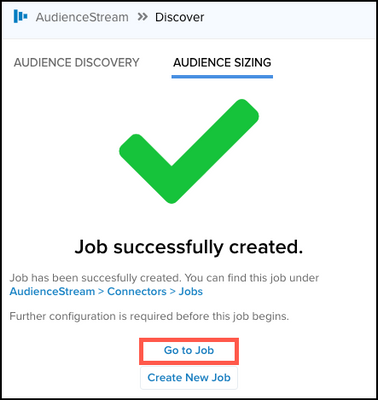
The job is successfully created.
Link the job to a connector
Now that the job is created, use the following steps to link it to a connector action:
- Click Go To Job to assign the connector action.
- In the jobs listing, select your job name.
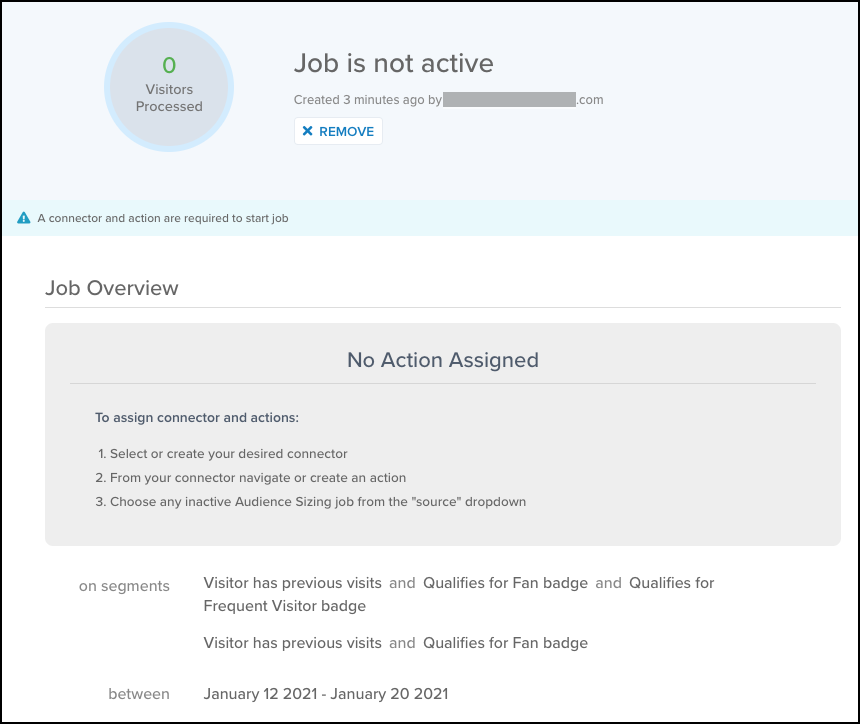
At this point, the job is inactive as it is not yet linked to a connector action. - Navigate to the connector you want or go to the connector marketplace to select a new connector.
- Add and configure the retargeting vendor selected.
- Complete the fields in the Configure tab.
- In the Actions tab, create a Send Email to user action (or other retargeting action).
- From the Source menu, select your job name from the drop-down list.
- Complete the set up of the connector action and save.
- Go back to Audience Sizing and follow the steps to activate your job.
Activate your job
Now that the job has been linked to a connector, use the following steps to activate it:
- In the sidebar, navigate to AudienceStream > Audience Connectors.
- Click the Jobs tab.
- Click your job to open it.
- Click Start.
- Save/Publish your profile.
The job will not start unless the Save/Publish step is successful.
This page was last updated: September 5, 2025