Manage server-side user permissions
This article explains how to manage user permissions.
Add a server-side only user
To give a user access to server-side, you must first add them in the client-side interface. In the client-side interface, you must have the Manage Users permission to add users to your account and the Manage Account permission to manage permissions in the server-side interface.
To add a user with only permission to a server-side profile, follow these steps:
- In the client-side interface, add the user, but do not select any client-side permissions.
The user must verify their email address before you can continue, at which point the user has read-only access to the client-side interface and appears in the Manage Users list in the server-side interface. - In the server-side interface, go to Manage Users and assign permission roles to grant the user access to a server-side profile, then click Next.
- Save your changes.
- Return to the client-side interface.
- In the admin menu, click Manage Users.
- In the User Manager dialog, select the user you want to remove.
- Click More and select Remove User.
- In the Remove User dialog, confirm the user to be removed, then click Remove User.
The user no longer has access to the client-side profile, but retains access to the server-side profile.
Edit server-side user permissions
To edit server-side user permissions, you must have the Manage Account permission, which is assigned from the client-side interface.
Use the following steps to view and edit server-side permissions for a user:
- Log into the server-side area of the Customer Data Hub.
- In the admin menu, click Manage Users. A list of all server-side users appears, including the user’s name, email address, and a timestamp for the last login.
- Click a user to display the permission details.
- To grant access to a profile, select a Permission Role.
- Repeat Step 3 through Step 5 for each user you want to edit.
- If no changes are needed, click X to close the user details and return to the user list.
You will be prompted to confirm your intention to disregard changes if you have made adjustments. - Click Save to keep your changes or Cancel to discard the changes.
Your changes are saved without the need to publish.
Set permissions for future profiles
Use the following steps to set permissions for future profiles, which allows user admins to define a profile-level permission role for users of new profiles created for an account.
- Log into the server-side area of the Customer Data Hub.
- In the admin menu, click Manage Users.
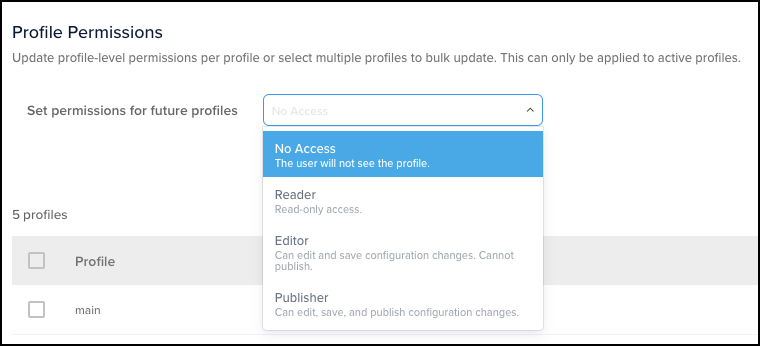
- In the Set permissions for future profiles list, select a role to be assigned to users of new profiles created for an account.

- Click Save to keep your changes or Cancel to discard the changes.
Your changes are saved without the need to publish.
Edit user permission roles in bulk
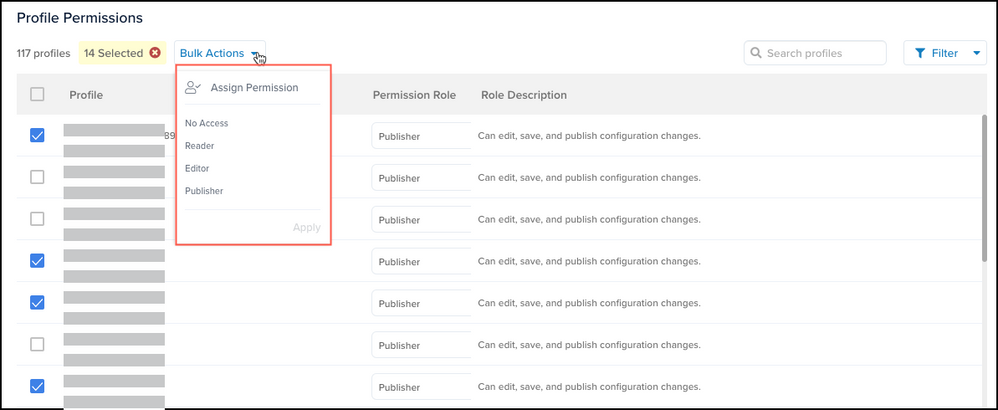
Use the following steps to edit the permission role for multiple users:
This page was last updated: July 25, 2023
