Publishing workflow
The Workflow Management feature activates a workflow process where all publishes to the Prod require approval.
How it works
The Workflow Management feature activates a workflow process where all publishes to the Prod require approval. Users without permission to publish to Prod can submit a publish request to Prod for approval by users with permission to publish to Prod. If approved, the changes will go to Prod. Otherwise, no publish occurs. While a version is pending approval, only approvers will be able to save changes to it. For this reason, it is important for submitters to always perform a Save as when publishing to Prod.
Familiarize yourself with the following terms and how they apply to Workflow Management when using this feature:
- Disabled
When Workflow Management is disabled (default setting), the Prod publish target is only available to users with permission to use it. - Enabled
When Workflow Management is enabled, the Prod publish target becomes available to any user with either the Publish to Dev or Publish to QA permission. - Submitter
Users that submit requests to publish to Prod are called submitters. When a submitter submits a version to publish to Prod, it is sent to a queue of pending publishes where it must be reviewed before it will actually publish. - Approver
Users with the Publish to Prod permission are notified of the pending request and can approve or decline the submitted version.
Workflow
The workflow from submitter to approver is as follows:
- A submitter performs a Save as and selects Publish To: Prod.
The saved changes are not actually published to Prod, but instead are sent to a queue to await review. - An email is sent to all approvers notifying them of the pending publish to Prod request.
- Any approver can log into the account/profile to review the pending publish and take one of two actions:
- Approve – the changes are approved and the version is published to Prod.
- Decline – the changes are denied and no publish occurs.
Setting Up workflow management
The following sections describe how to enable Workflow Management from the Publish Settings screen and then adjust user permissions by updating user permissions for your submitters and approvers.
Enable workflow management
Use the following steps to enable Workflow Management for your profile:
-
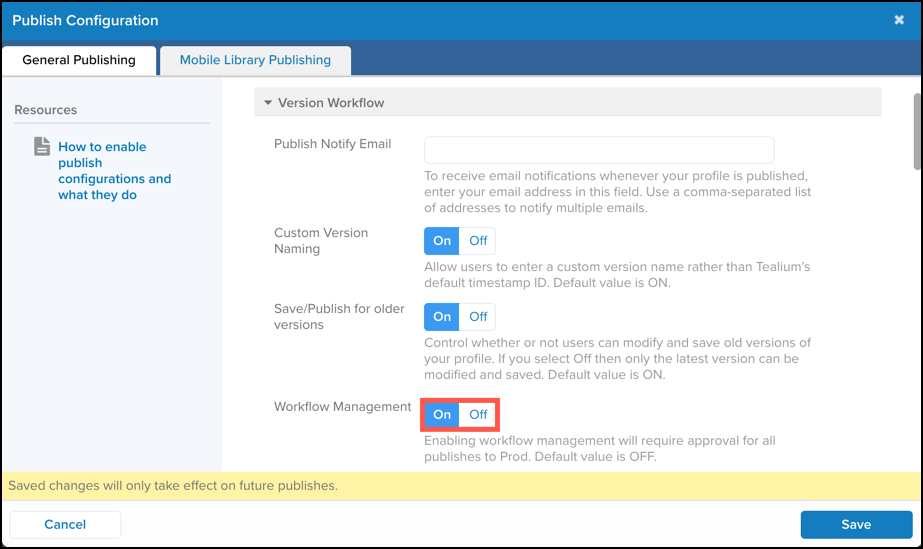
In the admin menu, click Configure Publish Settings. The Publish Configuration dialog appears.
-
In the Version Workflow section, scroll down to Workflow Management and click On.
-
Click Save. The Save/Publish dialog appears.
-
Click Save As.
It is important for the approver that the submitter uses Save As versus Save. If the submitter selects Save, the current version becomes locked for all submitters.
-
Enter a new title and descriptive notes.
-
Select one or more publish environments.
-
Click Publish.
Adjust user permissions
The workflow process is dependent on two types of users: submitters and approvers. The following sections describe how to adjust user permissions for each type of user.
Submitter permissions
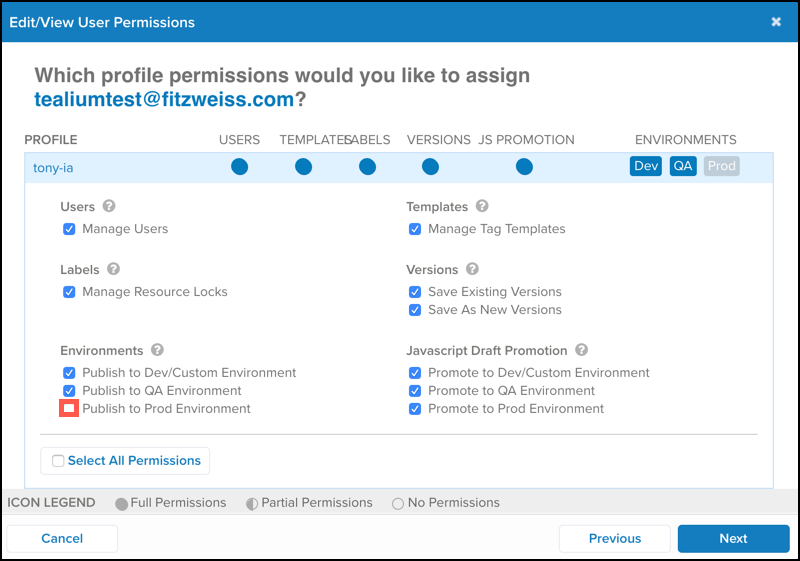
Submitters are users that cannot publish directly to Prod. Their changes must be approved through the workflow process. Submitters must have the Publish to Prod Environment permission removed. The Publish to QA Environment and Publish to Dev/Custom Environment settings should remain checked.
Use the following steps to adjust user permissions for a submitter:
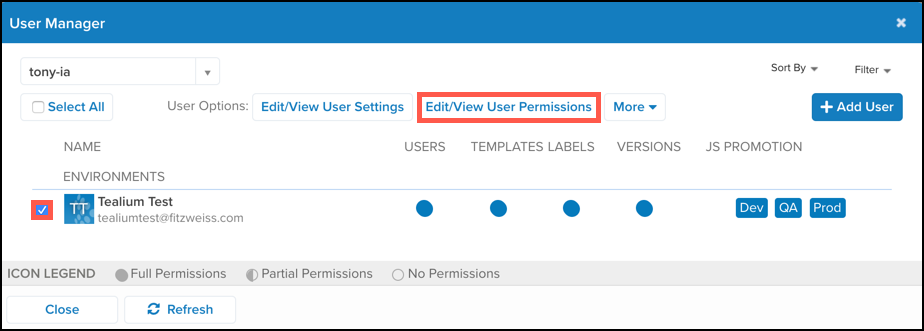
- In the admin menu, click Manage Users. The User Manager dialog appears.
- Click a checkbox to select an existing user or add a user, and then click Edit/View User Permissions.
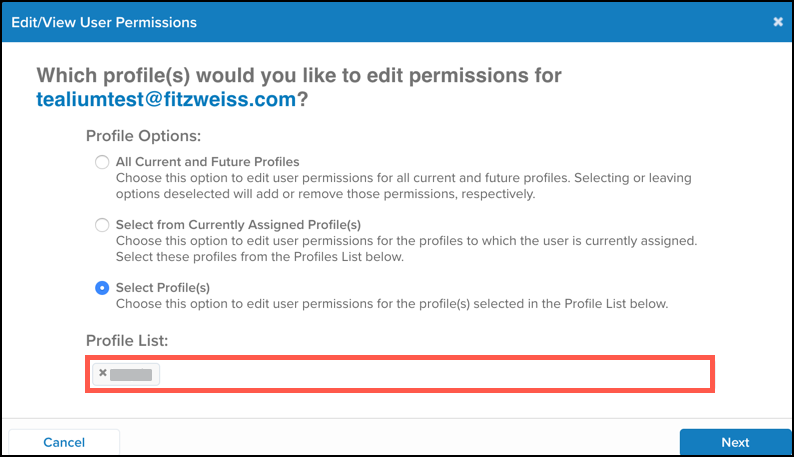
A new dialog appears. - Select the Select Profiles radio button and leave the default value of the current profile in the profile list.
- Click Next.
- Ensure that Publish to Dev/Custom Environment and Publish to QA Environment remain checked.
- Uncheck Publish to Prod Environment and then click Next.
- Click Finish.
- Click Close to close the Edit/View User Permissions dialog.
- Save and Publish your changes.
Approver permissions
Approvers are users that can publish directly to Prod, and they are responsible for reviewing pending publishes to Prod. Approvers must have the Publish to Prod Environment permission enabled. Due to the fact that all approvers receive email notifications each time a request for publish is submitted, it is best to limit the number of approvers in your profile.
Use the following steps to adjust user permissions for an approver:
- In the admin menu, click Manage Users. The User Manager dialog appears.
- Click a checkbox to select an existing user or add a user, and then click Edit/View User Permissions.
- Select the Select Profiles radio button and leave the default value of the current profile in the profile list.
- Click Next.
- Check Publish to Prod Environment and then click Next.
- Click Finish.
- Click Close to close the Edit/View User Permissions dialog.
- Save and Publish your changes.
Workflow example
Once you have enabled Workflow Management and set the publish permissions for your users, you are ready to see it in action. The following example shows the workflow process when Workflow Management is enabled.
Submitting a publish request
When a submitter makes changes, they save and publish to the Dev and QA environments freely and then an approver approves the change and published to Prod.
A submitter uses the following steps to submit a request to publish to Prod:
- When changes are complete, click Save/Publish.
- Click Save As.
- Enter version notes.
- In the Publish Locations section, select Prod - Approval Required.
- Click Publish.
A red box appears next to the Save/Publish button indicating that the publish is pending approval.
After a Save as and a request to publish to Prod has been sent, submitters may no longer make changes to that pending version until the request has been approved or declined.
Approving or declining a publish request
After a user has submitted a publish request, all approvers receive an email similar to the following regarding the request. Follow the instructions in the email and then navigate to the console to review the request.
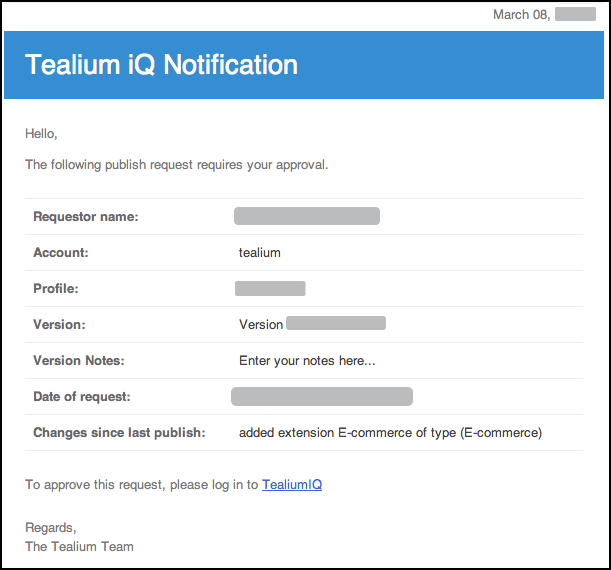
Use the following steps to approve or decline a publish request:
-
In the sidebar, go to iQ Tag Management.
-
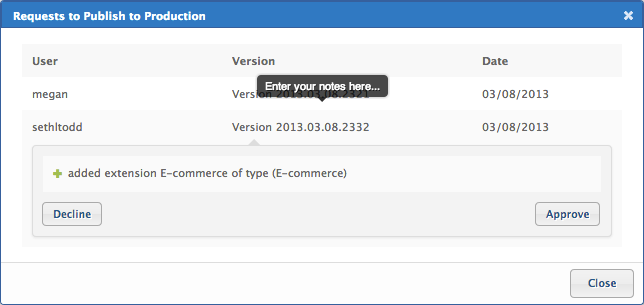
Click the red box next to the Save/Publish button, which indicates the number of publish requests awaiting your review.
The Pending Requests dialog appears. -
Click an entry to approve or decline.
The publish notes and action buttons appears. -
Click Approve or Decline.
- If you click Approve, the Save/Publish window appears and prompts you to save and publish as normal. Ensure that you select the Prod environment before publishing.
- If you click Decline, the request is declined and an email is sent to the requestor for further action.
-
Click Close.
This page was last updated: June 27, 2023
