Manage extensions
This article explains how to manage extensions.
Add extensions
Use the following steps to add an extension:
- In the sidebar, navigate to iQ Tag Management > Extensions.
- Click + Add Extension.
- Browse the extension categories using the multi-tab menu and click + Add next to the extension you want to use.
- Enter a Title to identify the extension.
- (Optional) Click Apply Labels on the left to add a label to categorize the extension.
- Under Scope, select a scope from the drop-down list or click Edit Load Order.
Learn more about the Load Order Manager. - Click Apply.
- Configure additional settings pertinent to the extension.
Publish locations

The publish location settings control which environments the extension will be published to. If you uncheck a publish location, the extension will not be published to that location. For example, if you uncheck Prod for an extension, and then publish to Prod, that extension will be omitted from the files in the Prod environment.
Available publish locations
The following publish locations options are available:
- Dev
The development (Dev) environment is a non-production environment intended for sandbox configuration. - QA
The Quality Assurance (QA) environment is a non-production environment intended for testing prior to releasing to production. - Prod
The Production (Prod) environment is the environment you intend to load on your live website. - Custom
(Optional) The Custom Environments selection only appears if previously configured using Custom Environments.
Publish locations can be used to prevent extensions that are in development from accidentally being published to Prod. For example, you may be working on a new extension and need it active for your QA environment, but do not want it to be included in any publishes to Prod. In this case, you simply uncheck the Prod publish location and the extension can remain active and not affect your Prod environment.
Duplicate extensions
An easy way create an extension is by copying an existing one that has similar functionality.
Use the following steps to copy an extension:
- Expand an extension.
- In the left side panel, click Duplicate.
A copy of the original extension is added to the bottom of the extension list. - Adjust the configuration of the new extension as needed.
View extension change history
To view the change history of an extension:
- In the sidebar, go to iQ Tag Management > Extensions.
- Click the extension you want to review. The extension details appear.
- Click View Change History.
Edit extensions
Extensions are editable directly from the extensions view. Expand an extension and adjust the configuration. As changes are detected, the Save/Publish button will turn orange to indicate unsaved changes exist.
Tealium does not recommend editing the uTag Sync extension.
Deactivate extensions
To turn off an extension and still keep it in your account for later use, use the On/Off switch. This is usually a better option than permanently deleting the extension because you will not lose the effort of the initial configuration.
Use the following steps to deactivate an extension:
- Click the On/Off toggle next to the extension to deactivate.
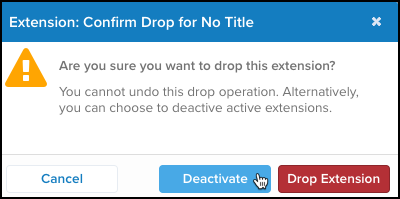
A confirmation dialog appears. - Click Deactivate to confirm your action.

Delete extensions
If an extension is no longer needed, it can be deleted permanently from the configuration.
Use the following steps to delete an extension:
- Expand an extension.
- In the left side panel click Delete.
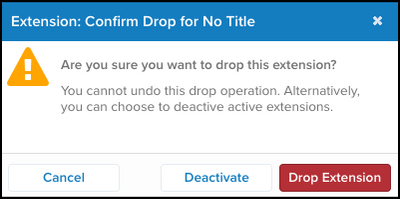
A confirmation dialog appears. - Click Drop Extension to confirm the action.

If you accidentally delete an extension and have not saved the profile, you can reload the browser to return to the original state of your extensions.
This page was last updated: June 10, 2025