Manage variables
This article explains how to manage variables.
Data layer tab
The Data Layer tab offers several ways to manage the variables in your data layer. Each variable that you implemented on your website must also be created here so that it can be used in your configuration. In addition to the dynamic data you populate in your site’s Universal Data Object (UDO), a number of other built-in variables from your pages are available to be added from this screen.
Learn more about the built-in variables available in the UDO.
If you’re unsure about what data might be available from a web page on which Tealium is installed, use the Universal Tag Monitor to quickly see what data is being collected.
Add a variable
Use the following steps to add a single variable:
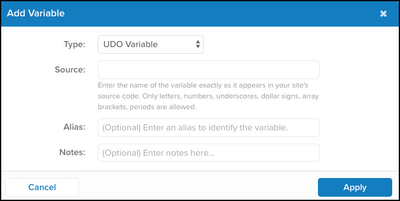
- Navigate to the Data Layer tab and click Add Variable. The Add Variable dialog box appears.
- Enter the following fields:
- Source: (Required) The name of the variable exactly as it appears in your site’s source code
- Type: (Required) The type of variable, as specified below
- Alias: an additional name for the Variable, usually if the Source name is not intuitive
- Notes: Useful comments about the Variable, especially useful for the next person that uses your account. Click AI Note to generate notes with AI. For more information, see AI Note Generation.

When using variables in EventDB, column names for variables must consist of only UTF-8 printable characters. ASCII characters in standard and delimited identifiers are case-insensitive and are folded to lower case. For additional details, see Amazon Web Services - Names and identifiers.
Bulk import variables
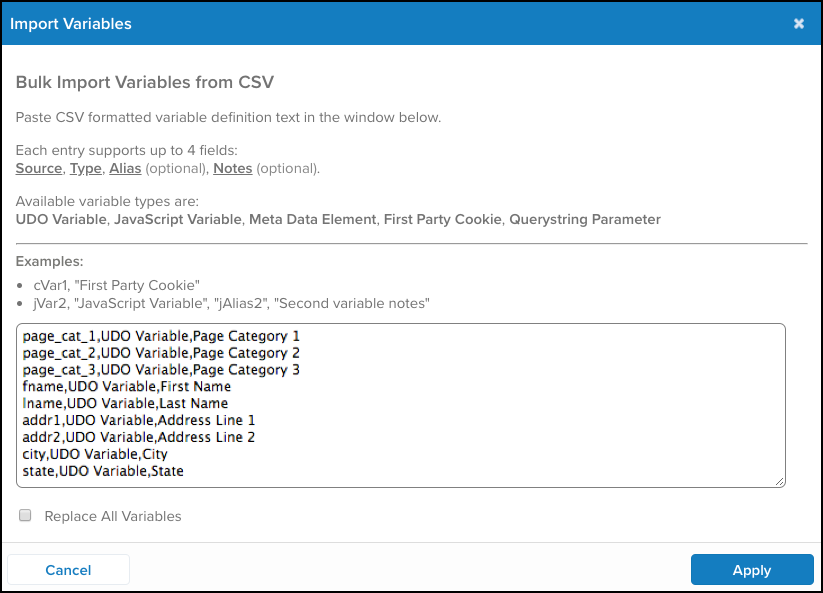
Adding variables individually can take some time. Tealium iQ provides an easy way to add numerous variables at the same time with the Bulk Import from CSV option.
Use the following steps to add variables using the Bulk Import from CSV option:
-
Click the down arrow to the right of the + Add Variable button to reveal more options.
-
In the Import Variables dialog, enter the variables you want to add into the text box with a comma-separated values (CSV) format. There are a few things you should be aware of:
- Each variable entry supports four values in this order:
Source, Type, Description (Optional), Alias (Optional)
These correspond to the same values you would enter if you were adding a variable from the Add Variable dialog. - These values must be separated, or delimited, by a comma.
- You may enclose each value with quotes, but they are not required.
- Each variable entry supports four values in this order:
Checking the Replace All Variables box removes all the current variables and replaces them with the variables you enter in the text field.
View variable details
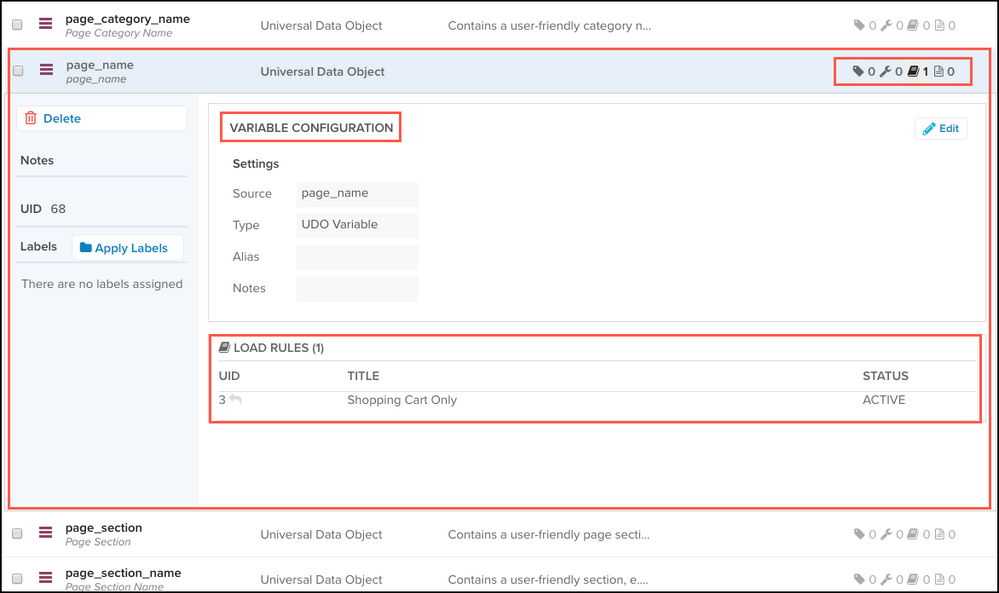
The expanded view of a variable provides a condensed view of variable details. When you expand the variable summary to show the details, a list of the dependencies is displayed. The dependencies make it easy to see which tags, load rules, and extensions are referencing this variable. From this view, you can edit a variable, delete a variable, or manage labels.

Edit a variable
To edit a variable, follow these steps:
- Click a variable to expand the view.
- Click Edit.
- Make changes and click Apply.
- Click Save/Publish to save the change.
Bulk edit variables
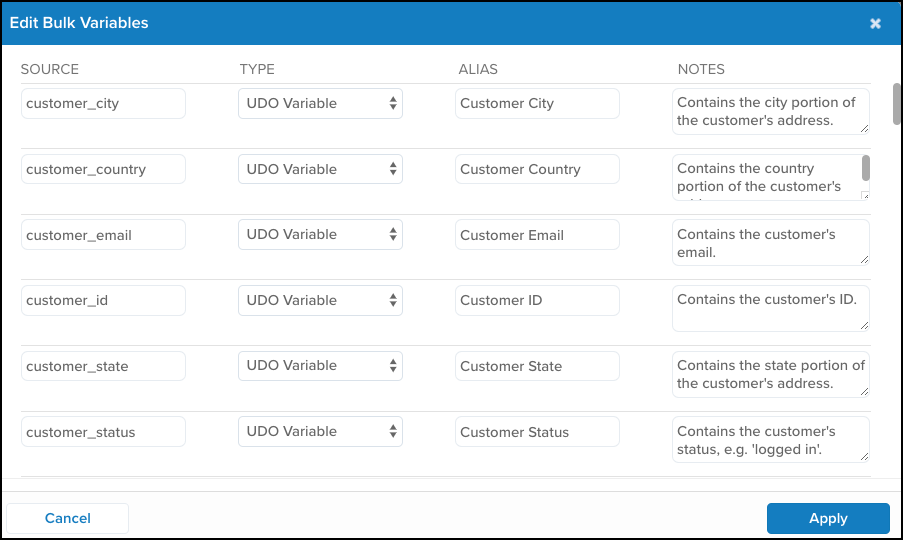
You can bulk edit all variables or edit multiple variables from the Data Layer tab.
To edit all variables follow these steps:
- Click the Edit All button in the Data Layer tab. The Edit Bulk Variables dialog appears from which you can make changes.

- Click Apply to apply the changes.
- Click Save/Publish to save the change.
To bulk edit selected variables, select the checkboxes beside the variables and click Edit Selected.
Delete a variable
To delete a variable, follow these steps:
- Click a variable to expand the view.
- Click the Delete button underneath the variable name. The Confirm Remove dialog appears.
- Click OK to confirm.
- Click Save/Publish to save the change.
This page was last updated: September 10, 2025

