Consent integration
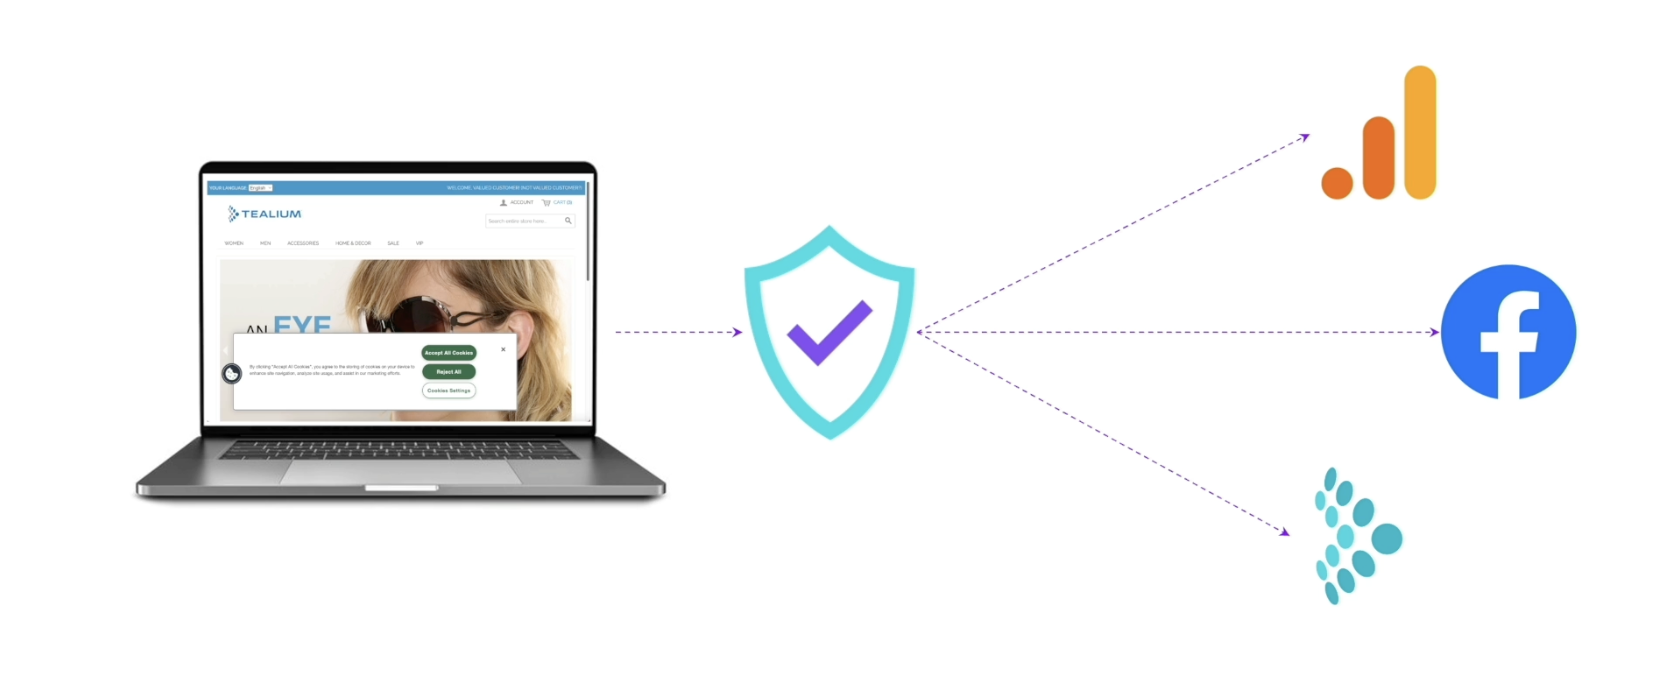
This guide describes how to set up a supported vendor integration with Tealium iQ tag management system and verify your set up so that tags fire only when users have given their consent.
In this guide, we use OneTrust consent integration with Tealium iQ tag management system, but this setup can be applied to any of the supported vendor integrations. By the end of this guide, you’ll have successfully integrated OneTrust or any other supported Consent Management Platform (CMP) of your choice and the relevant enforcements in Tealium iQ to ensure your tags respect user preferences.

Complete the following steps to set up OneTrust consent integration in Tealium iQ:
- Load the CMP script
- Configure the integration
- Set enforcement rules
- Select publish location
- Create a purpose group
- Edit purpose group
- Assign Tealium iQ to a purpose
- Map tags to purposes
- Publish the configuration
Additionally, we’ll verify and troubleshoot our setup with the following steps:
- Check the data layer
- Verify your consent integration setup from the browser console
- Use the debug mode to view additional information
Requirements
Creating a consent integration requires the following:
- Tealium iQ Tag Management
- Client-side consent integrations
To set up your integration, you’ll need the following vendor-specific information:
- Vendor ID: Used by consent integrations to identify the CMP on the page.
- Configured consent categories: Consent integrations refers to each of these as a purpose, and a collection of purposes from one CMP is called a purpose group.
You can retrieve this information directly from the web page after accepting all tracking. For more details on how to obtain it, refer to supported vendor integrations.
Load the CMP script
To begin, we’ll inject the OneTrust CMP script into the website using either a Pre Loader or DOM Ready extension. For this setup, you’ll need your configured CMP script, which you can obtain from your CMP provider. In this example, we’ll use a OneTrust CMP script retrieved from the OneTrust console.
- Go to iQ Tag Management > Extensions.
- Click + Add Extension > Advanced.
- Add a Javascript Code extension.
- Enter a Title to identify the extension.
- Under Scope, select Pre Loader or DOM Ready Extensions.
- Under Configuration, paste the OneTrust CMP script:
// Define a function to load the Vendor CMP script
window.addCmp = function () {
  var domainId = '12345678-1234-1234-1234-1234567890ab-test';

  var head = document.getElementsByTagName('head')[0];
  var script = document.createElement('script');
  script.type = 'text/javascript';
  script.src = 'https://cdn.cookielaw.org/scripttemplates/otSDKStub.js';
  script.setAttribute("data-domain-script", domainId);
  // script.setAttribute("data-domain-script", b['OTDomainGUID']);
  script.async = true;
  head.appendChild(script);
};

// Immediately call the 'addCmp' function to load the script
window.addCmp();
Next, we’ll configure the integration to ensure tags fire only based on the consent users provide.
Configure OneTrust consent integration in Tealium iQ
Step 1: Configure the integration
- Go to the iQ Tag Management > Consent Integrations section.
- Click Add Integration.
- Enter a name for the integration that clearly identifies its purpose.
- Select OneTrust from the vendor drop-down list.
- Enter the Vendor ID obtained from the OneTrust console.
- To automatically create standard purposes from OneTrust, select Create new Purpose Group with OneTrust Default Categories.
- Click Next.
Step 2: Set enforcement rules
Enforcement Rules determine when the consent signals captured by your CMP should be enforced. To make sure that consent is always enforced correctly, each page view or event on your website should trigger only one consent integration or exemption with no overlaps.
- Select All Pages and Events from the drop-down list because we’re configuring only a single integration.
- Click Next.
Step 3: Select publish location
The Publish Location screen lets you choose the environments where the integration will be applied. We recommend publishing to a test environment first before going live. For this example, we’ll publish to all environments.
- Select the Dev, QA, and Prod environments.
- Click Next.
Step 4: Select purpose group
- On the Purpose Group screen, select OneTrust Default from the drop-down list.
- Click Save to save your consent integration.
Step 5: Edit purpose group
After saving your consent integration, you’ll need to edit your purpose group to assign Tealium iQ to a purpose and map tags to purposes.
To edit purpose group:
- In the Consent Integrations screen, click the Purpose Groups tab.
- Select the OneTrust Default purpose group created in step 1.
Step 6: Assign Tealium iQ to a purpose
The Tealium iQ Purpose screen lets you map Tealium iQ to a specific purpose, which is critical for managing all tag operations. If consent is required and the user does not consent to that purpose, Tealium iQ will not load, and as a result, no tags will function.
- Click the Tealium iQ Purpose tab.
- To ensure Tealium iQ always loads, we’ll assign Tealium iQ to the Strictly Necessary purpose so that users cannot opt out.
Step 7: Map tags to purposes
The Map Tags screen lets you assign tags to specific purposes, ensuring that the correct tags fire based on the user’s consent choices. It’s important to assign a purpose to every tag, as tags without a purpose will not fire. In this screen, you can also configure tag refiring, which enables a tag to refire if the user’s consent is updated within the same event.
- Click the Map Tags tab.
- Assign each tag to an appropriate purpose.
- Enable tag refiring if you want tags, such as the Tealium Collect tag, to refire when consent is updated in the same event.
- Click Save to save the purpose groups.
Step 8: Publish the configuration
Save and publish the Tealium iQ profile to begin using the consent integration with your CMP.
You have now successfully configured the OneTrust integration within Tealium iQ. This setup ensures that your tags fire only when user consent is granted on all pages and events, in line with the configurations you’ve set up in your CMP. Ensure that the integration is working correctly by testing it in your chosen environment. For more information about how to test, see testing and troubleshooting below.
Test and troubleshoot
Now that we’ve configured the consent integration, let’s make sure it’s working. In this section, we’ll validate that the OneTrust consent integration in Tealium iQ is functioning correctly. We’ll check the data layer for the consent state and use the browser console to validate our setup.
Before you begin, ensure that:
- Tealium iQ and OneTrust consent integration are up and running on your website.
- You have access to the browser’s developer console.
Check the data layer
The consent state is added to the data layer right before tags are fired. To ensure that the consent state is loaded properly, check for Tealium consent variables with the tci prefix:
tci.consent_type: Identifies the consent type (implicit or explicit).tci.purposes_with_consent_all: Contains an array with all consented purposes.tci.purposes_with_consent_unprocessed: Contains all unprocessed consented purposes.tci.purposes_with_consent_processed: Contains all processed consented purposes.
The unprocessed and processed variables can be used to build logic to ensure EventStream and AudienceStream connectors don’t fire multiple times for the same event.
Verify your consent integration setup
After consent integrations are active, you can access the current consent integration details directly from the browser console. A set of functions are available within the tealiumCmpIntegration window-scoped object for managing and interacting with the integration.
To retrieve the relevant information from the web page follow these steps:
-
Visit your website, where the CMP is implemented.
-
Accept all tracking.
-
Open the Developer Tools JavaScript console.
-
Paste the following snippet into your browser console.
var outputString = `${tealiumCmpIntegration.cmpName} - ${tealiumCmpIntegration.cmpCheckIfOptInModel() ? 'Opt-in' : 'Opt-out'} Model

Checks:
- vendor id:            ${tealiumCmpIntegration.cmpFetchCurrentLookupKey()}
- well-formed decision: ${tealiumCmpIntegration.cmpCheckForWellFormedDecision(tealiumCmpIntegration.cmpFetchCurrentConsentDecision())}
- explicit decision:    ${tealiumCmpIntegration.cmpCheckForExplicitConsentDecision(tealiumCmpIntegration.cmpFetchCurrentConsentDecision())}
- consented purposes:   ${JSON.stringify(tealiumCmpIntegration.cmpConvertResponseToGroupList(tealiumCmpIntegration.cmpFetchCurrentConsentDecision()).sort(),null, 8)}
`
console.log(outputString)
Analyze the script output
-
Before Consent:
Here’s an example of the script output before consent is granted.

As shown, the CMP has been detected with its operating mode. In this case, explicit consent from the user has not been provided, so only
C0001(Necessary) purpose is permitted. -
After Consent:
Now, let’s consent to some categories. After reloading the page, you can see the CMP and its operating mode again. This time, explicit consent has been granted, but only
C0001(Necessary) andC0002(Performance) purposes are permitted.
Use the debug mode to view additional information
Consent integrations also adds additional information to the Tealium debug mode.
- Enable the debug mode to view additional consent integration information.
- To make it easier to find the consent integration information in the debug mode output, filter the output using the regular expression
/SENDING|****/to only show tag send and consent integration notifications.
Using the debug mode filter isolates critical consent-related messages, enabling you to:
- Quickly verify tag behavior based on consent choices: The filter highlights which tags are sent or blocked according to user consent, ensuring your setup respects user preferences.
- Easily identify potential configuration issues: By focusing on relevant log entries, the filter helps spot problems like missing purpose mappings or unintended tag blocking, so you can resolve them more efficiently.
Here are a few scenarios you might encounter with the debug mode filter.
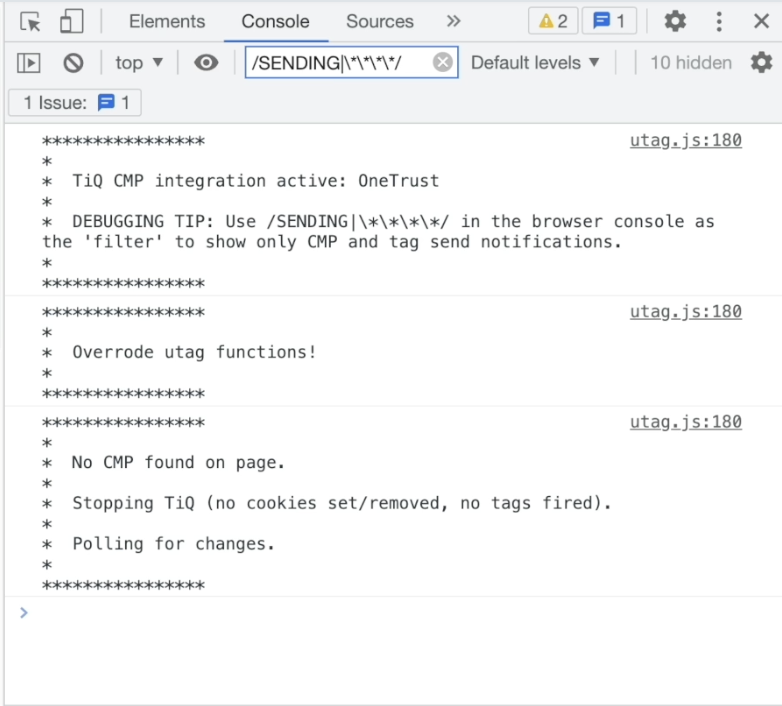
Scenario 1: Blocking the CMP script

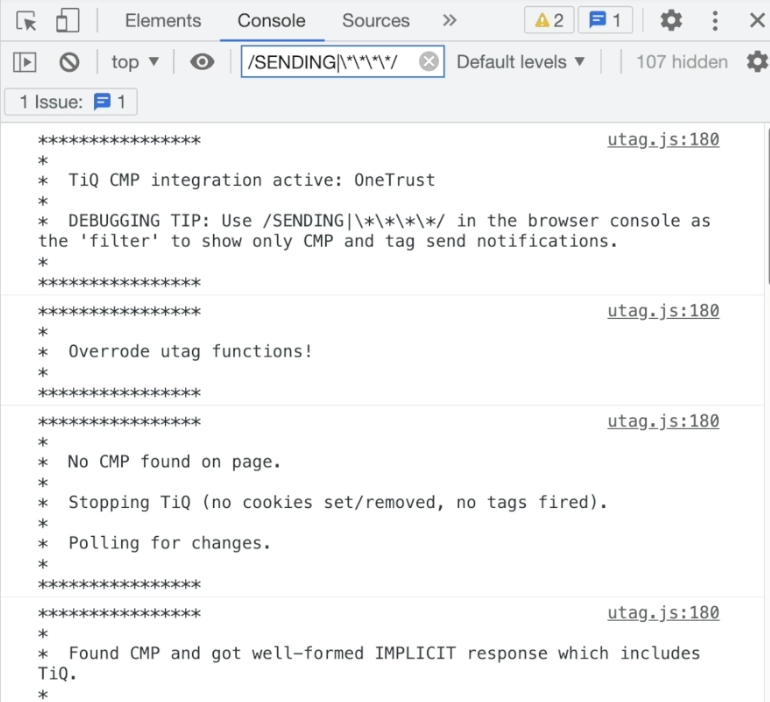
Scenario 2: CMP in opt-in mode before cookies are accepted

Here, the CMP is operating in opt-in mode, and the user has not yet provided explicit consent. Before the user accepts cookies, consent integrations detects implicit consent for purposes mapped to Necessary only, preventing other purposes from loading. Because we are in opt-in mode, the system continues to poll for an explicit consent decision.
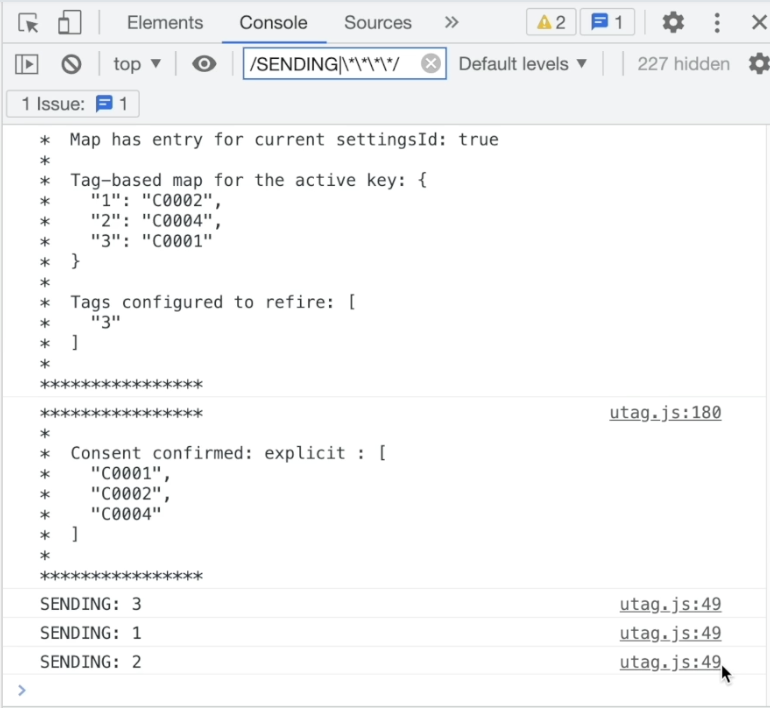
Scenario 3: CMP in opt-in mode after cookies are accepted

In this scenario, after the user consents to cookies, consent integrations detects the explicit consent and reviews the newly consented purposes, excluding any that were already processed under implicit consent. It then checks for tags mapped to the newly consented purposes and queues them for firing. Note that any tags not mapped to a purpose remain blocked from loading.
For more information, see Validate and debug consent integrations.
This page was last updated: September 4, 2025