Google Ad Manager Spotlight Tag Setup Guide
This article describes how to set up the Facebook Pixel tag
The Google Ad Manager Spotlight tag was formerly called the DoubleClick Spotlight tag. The DoubleClick Spotlight tag is deprecated.
Tag Specifications and Requirements
Specifications
- Name: Google Ad Manager Spotlight
- Vendor: Google
- Type: Conversion Tracking
Requirements
- Services: DFA (Google Ad Manager for Advertisers) Account
Configurations:
- Region Code
- Advertiser ID
- Spotlight activity
- Type of Spotlight activity
- Web address of the DFA ad server
Tag Configuration
Adding the Tag
Tealium iQ’s Tag marketplace offers a wide variety of tags. Click here to learn how to add a tag to your profile.
Configuring the Tag
Use the following steps to configure the tag:
-
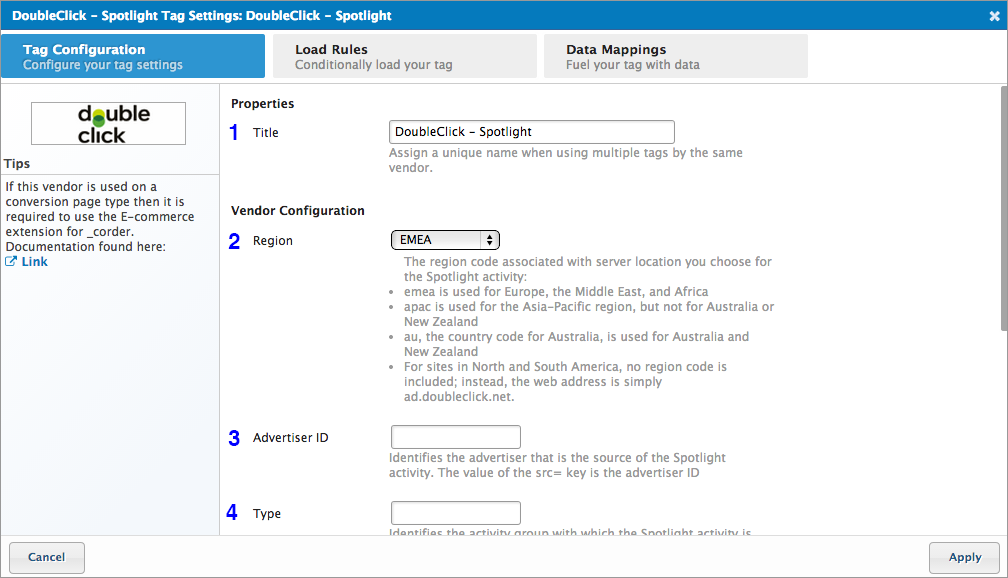
Title: Required. Enter a descriptive title to identify the tag instance.

-
Region: Required. Select the region where the server where the Spotlight activity is located. For example:
Americas -
Advertiser ID: Required. This is the ID of the source advertiser that is tracking the Spotlight activity. Enter the value of the
srckey in this field. For example:1234567 -
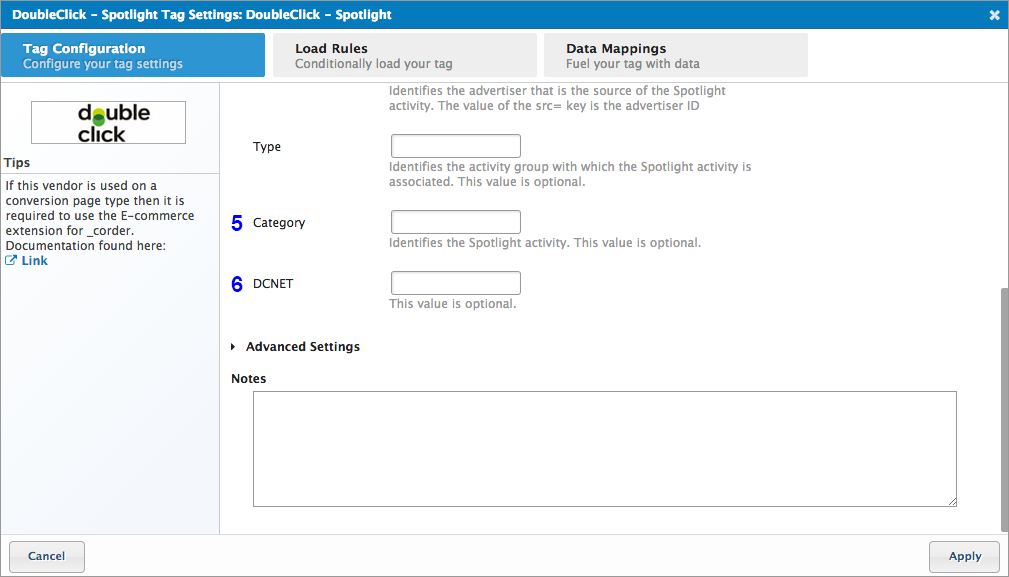
Type: Required. Enter the 8-character string of the group/type of Spotlight activity. For example:
abcde123 -
Category: Required. Enter the 8-character string assigned to the Spotlight activity being tracked. For example:
fghij456 -
DCNET: Optional. If your image pixel contains a dcnet value, you can enter it here.

Place this ag at the top of the list in the ags tab to ensure that it loads as soon as the page starts loading.
Applying Load Rules
Load Rules determine when and where to load an instance of this tag. The Load on All Pages rule is the default load rule. To load this tag on a specific page, create a new load rule with the relevant conditions.
As a best practice, set up load rule conditions to strategically load these tags on the pages where you want to track the conversion.
Setting up Mappings
Mapping is the simple process of sending data from a data source, in your data layer, to the matching destination variable of the vendor tag.

Mapping
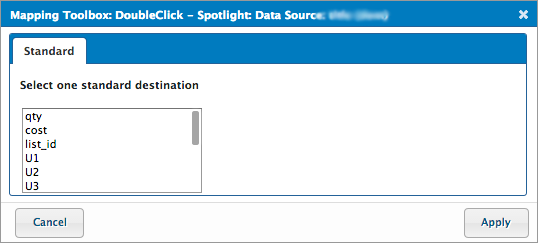
The following table describes the standard destination variables available from the Mapping Toolbox.
| Variable | Description |
|---|---|
qty |
Map to this variable to indicate the quantity of items sold or the number of transactions for an item. |
cost |
Map to this variable to indicate the amount of revenue generated by the transaction. |
list_id |
Map to this variable to send the identifier of the boom list (created by the advertiser for retargeting purpose). |
U1 through U10 |
Map to one or more variables to send custom data. |
Vendor Documentation
This page was last updated: September 15, 2018